
As home entertainment systems evolve, a well-placed television can significantly enhance your viewing experience. A 3D printed TV riser is an excellent solution to achieve the perfect height and style for your TV setup. This guide will walk you through the process of designing and printing your custom TV riser, ensuring it meets all your needs. A 3d-printed TV riser changes home entertainment configurations. 3D printing provides a unique, reasonably priced, and fashionable answer, whether your goals are to improve the look of your room, make extra storage space, or lift your TV for better viewing angles.
Conventional TV risers could be costly, extensive, or unsuitable for your particular use. Using 3D printing lets you create a riser exactly matching your TV’s measurements, furnishings, and own taste.
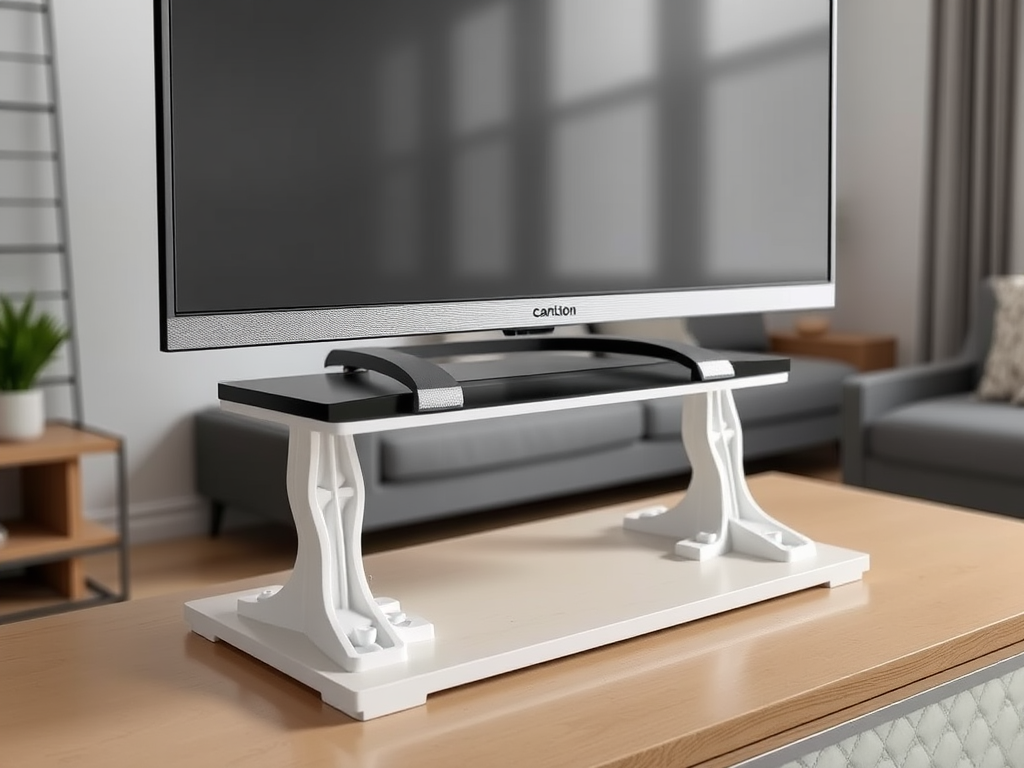
Ideal Materials for a 3d-Printed TV Riser
1. PLA (Polylactic Acid)
Best for lightweight TV configurations and ornamental risers
Easily printed with minimum warping.
Available in many colours and finishes
Best for: Small to medium-sized TVS
2. PETG (Polyethene Terephthalate Glycol)
Stronger and more impact-resistant than PLA
Withstands heat better, preventing deformation
Great for risers carrying heavier TVS or gaming consoles
Best for: Medium to heavy-duty risers with storage options
3. ABS (Acrylonitrile Butadiene Styrene)
Highly durable and wear-resistant
Requires a heated bed for best results
Can be post-processed with acetone for a flawless finish
Best for: Professional installations and industrial-strength risers
4. Carbon Fibre Reinforced PLA/PETG
Lightweight yet ultra-strong
Sleek, matte finish for a premium appeal
Ideal for large TV risers needing excellent rigidity
Best for: Heavy-duty risers with an aesthetic touch
Building and Printing a 3d Printed TV Riser
1. Selecting Appropriate Dimensions
Before printing, measure:
- TV base width and depth
- Desired height elevation
- Weight capacity requirements
- Additional space for equipment or soundbars
2. Making a 3D Model or Downloading One
Find pre-made STL files for TV risers on:
- Thingiverse
- Printables (Prusa)
- Cults3D
- GrabCAD
For custom designs, use Fusion 360, Tinkercad, or Blender to create a riser that fits your exact needs.
3. Print Orientation and Settings
- Layer Height: 0.2mm for a balance of speed and detail
- Infill Density: 30–50% for stability
- Wall Thickness: Minimum 3-4 perimeters for strength
- Print Speed: 40-60mm/s for accuracy
- Supports: Enable for ornamental elements and overhangs
4. Finishing and Post-Processing
- Sanding & Painting for a polished look
- Epoxy or Acetone Vapor Smoothing (for ABS)
- Rubber Feet or Anti-Slip Pads for stability
Common Problem Troubleshooting
1. The Riser is Not Strong Enough
✅ Solution: Increase wall thickness and infill percentage to provide more strength.
2. Print Warping or Lifting Off the Bed
✅ Solution: Use a heated bed (set to 60°c for PLA, 80°c for PETG, and 100°c for ABS) and apply a glue stick or a PEI sheet.
3. Layer Separation or Cracking
✅ Solution: Reduce print speed and slightly increase hot-end temperature.
4. Overhangs or Supports Breaking Off
✅ Solution: Print at a slower speed and use tree supports for complex overhangs.
5. Uneven Weight Distribution
✅ Solution: Ensure symmetrical leg design and reinforce contact points.
Why Go for a 3d-Printed TV Riser?
1. Flexibility and Customising
Using 3D printing allows you to create a riser matching any TV size and style. The options are unlimited, whether your preferred stand is elegant and minimalist or a multi-tier riser with storage sections.
2. Affordable Fix for Cost
Print one for a fraction of the cost instead of spending $50-$200 on commercial TV risers. Using reasonably priced materials and obtaining a luxury appearance is made possible with 3D printing.
3. Improved Ergonomics
Reducing neck pain and enhancing posture, a TV riser helps your screen to be eye level. A riser will significantly improve your TV viewing experience if you often find pain while watching.
4. Additional Organisation and Storage
Many TV riser designs feature built-in shelves or compartments, providing extra room for:
- Gaming consoles
- Streaming devices (Apple TV, Roku, Fire Stick)
- Soundbars
- DVDS, remotes, or décor pieces
5. Sustainable and Green Friendly
Using recyclable and biodegradable filaments like PLA, 3D printing helps lower environmental impact compared to mass-produced plastic risers.
READ MORE- 3D Printed Strongback: Crafting Durable Supports for Your Projects
FAQs:
1. Can a 3d-Printed TV Riser Carry Heavy TVs?
Yes, but the design, infill, and material selection play a crucial role. PETG and Carbon Fibre Reinforced Filaments are best for heavier TVS.
2. How Long Does a TV Riser Take to Print?
Print times range from 6 to 24 hours, depending on size and infill settings.
3. Can I Add Shelves or Compartments to My Riser?
Yes! Many 3D models include built-in storage for streaming devices, remotes, and gaming consoles.
4. What’s the Best Filament for a Stylish, Modern TV Riser?
Carbon Fibre PLA/PETG offers a sleek, premium look while maintaining high strength.
5. Where Can I Find Free STL Files for a TV Riser?
Try Thingiverse, Cults3d, Printables, or Grabcad for free, high-quality 3d designs.
Conclusion:
Selecting appropriate materials, print settings, and post-processing methods will help you to produce a TV riser that improves your viewing experience in both appearance and functionality. Affordable, durable, and aesthetically pleasing 3d printed TV risers are a great way to personalise your home entertainment setup. 3d printing offers countless alternatives, whether your needs call for a basic stand or a multifarious riser with storage.